How to insert an electronic signature into a PDF

Ever spent an hour banging your head against the wall trying to add your signature to a PDF document, only to give up and sign it by hand? Yep, us too! Well, save the head injuries for another incomprehensibly hard task and read on to master this time saving task.
Things you’ll need:
- Adobe Acrobat Reader DC (free to download) OR Adobe Acrobat Pro OR Preview (Mac Users only)
- The PDF you need to sign
- The tools listed in ONE of the following options; Option #1: A mouse/ trackpad/ Wacom tablet (or similar), Option #2: Pen and paper AND either a scanner or a camera (smartphones are ok!), Option #3 (Mac Users Only): A computer with a webcam
Please note, these instructions are for Adobe Reader DC which is the latest version of the program at the time of posting. The instructions may still work for older versions, but for the best results, update your software before proceeding.
Using Adobe Acrobat Reader or Acrobat Pro
First, open up the PDF you wish to sign with Adobe Acrobat Reader DC or Acrobat Pro DC. Next, head over to the ‘Tools’ menu. Find the option to ‘Fill and Sign’ and click on it.

Once open, you’ll see a 'sign' icon that looks like a pen in the centre of the toolbar. Click on this. If you’ve never set up a signature before, it will show you two options The first is to 'Add Signature', the second is to 'Add Initials'. We’re looking to add a signature, so select the first option.
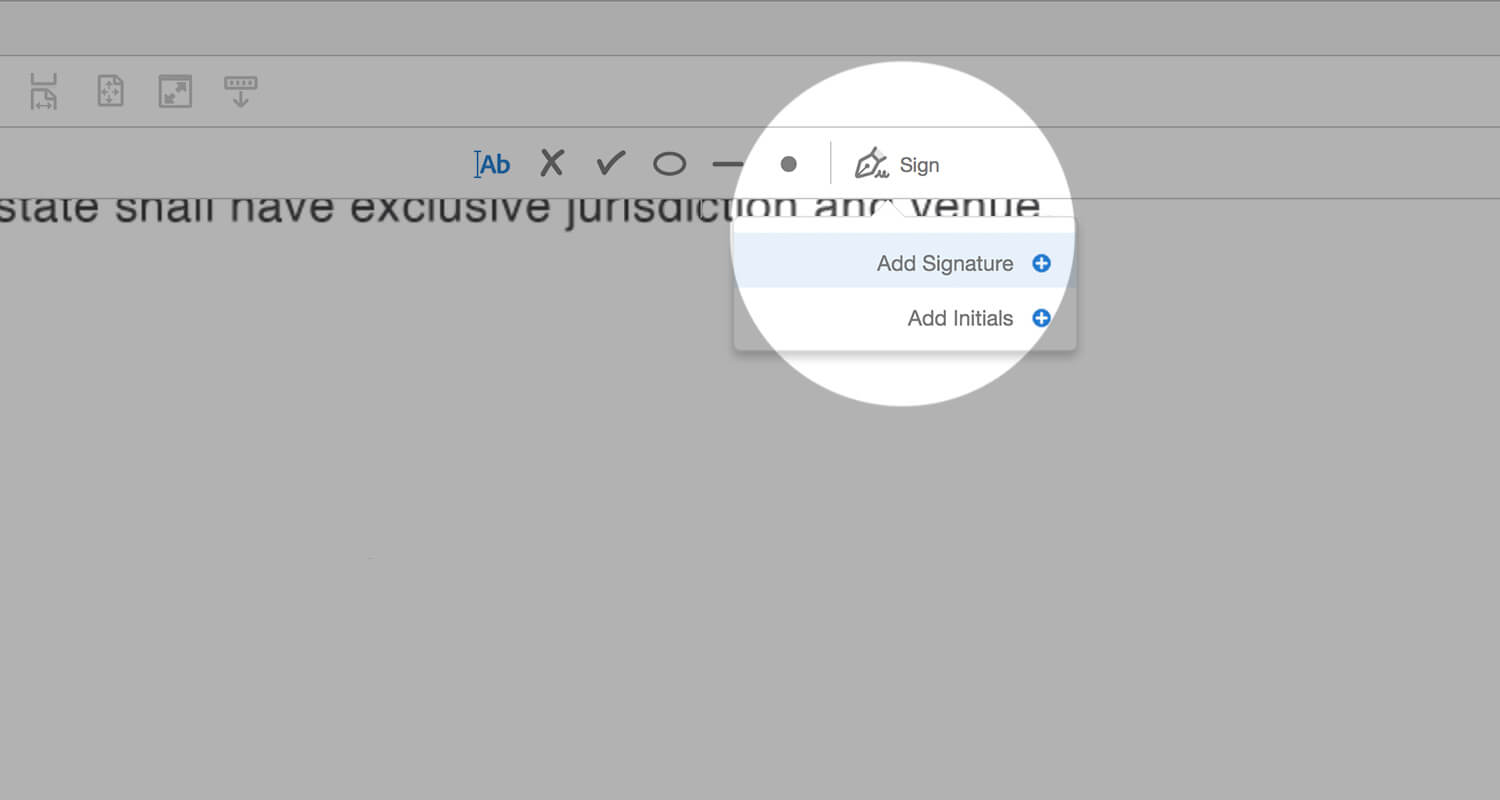
Unfortunately the option to sign using a webcam is not available in Adobe Acrobat Reader DC. Although, strangely, the feature was available in older versions of Adobe Acrobat Reader for Windows. If you are a Mac user and would prefer to use a webcam to set up your signature (my personal preference), you can use the Preview application (see instructions further down the page).
If you're continuing with the Adobe software you can select from three options to sign.
1. Type a signature in a default font
If you don’t mind that the signature is not in your own handwriting, this option provides an easy way to sign. Simply type your name and hit done!
2. Draw your own signature
This one is for those with a steady hand. You can use a Wacom pen/tablet or your mouse to sign. If you make a mistake, simply hit clear. Once you’re satisfied with your signature, click ‘done’.
3. Upload an image of your signature
If you prefer to sign with a pen, simply find a clean, white sheet of paper and sign with a black pen in the centre. You can either scan this or take a photograph of it. If you’re taking a photograph, take it in a well lit room with no shadows for the best results. When you've got a good photo or scanned image, save it so that you can access it on your computer. Adobe Reader supports JPG, JPEG, PNG, GIF, TIFF, TIF, and BMP files, so make sure it's saved in one of these formats. Once you're ready, select the 'Upload an Image' option in Adobe Reader and choose the image you saved. Hit ‘upload’ and if you’re happy with the image click ‘done’.
With any of the three options listed, once you click 'done' you’ll now have a signature available to place anywhere on the page. Click anywhere on the page to release it and you should be able to re-size it by dragging the corners. Adobe Reader should remember your signature, so the next time you want to sign, you won’t have to set up your signature again, just click on the Sign icon and click on your signature to insert it.
Using Preview (MAC only)
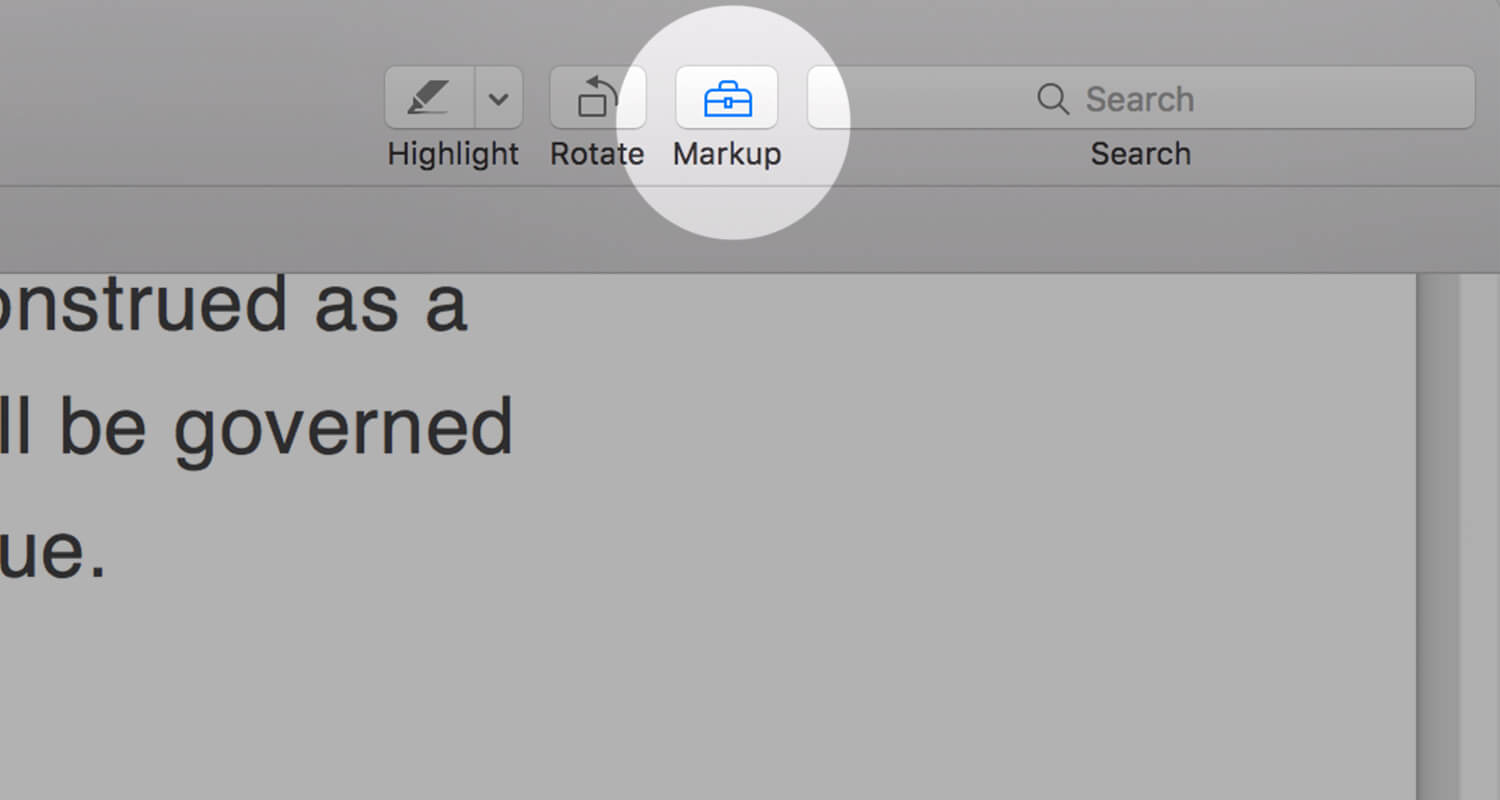
Open the PDF you want to sign in Preview. In the toolbar, click on the ‘Markup Toolbar’ icon that looks like a toolbox. Note: In older versions of Preview this is called the ‘Edit Toolbar’
Once open, find the ‘Sign’ Icon and hit the drop down menu.
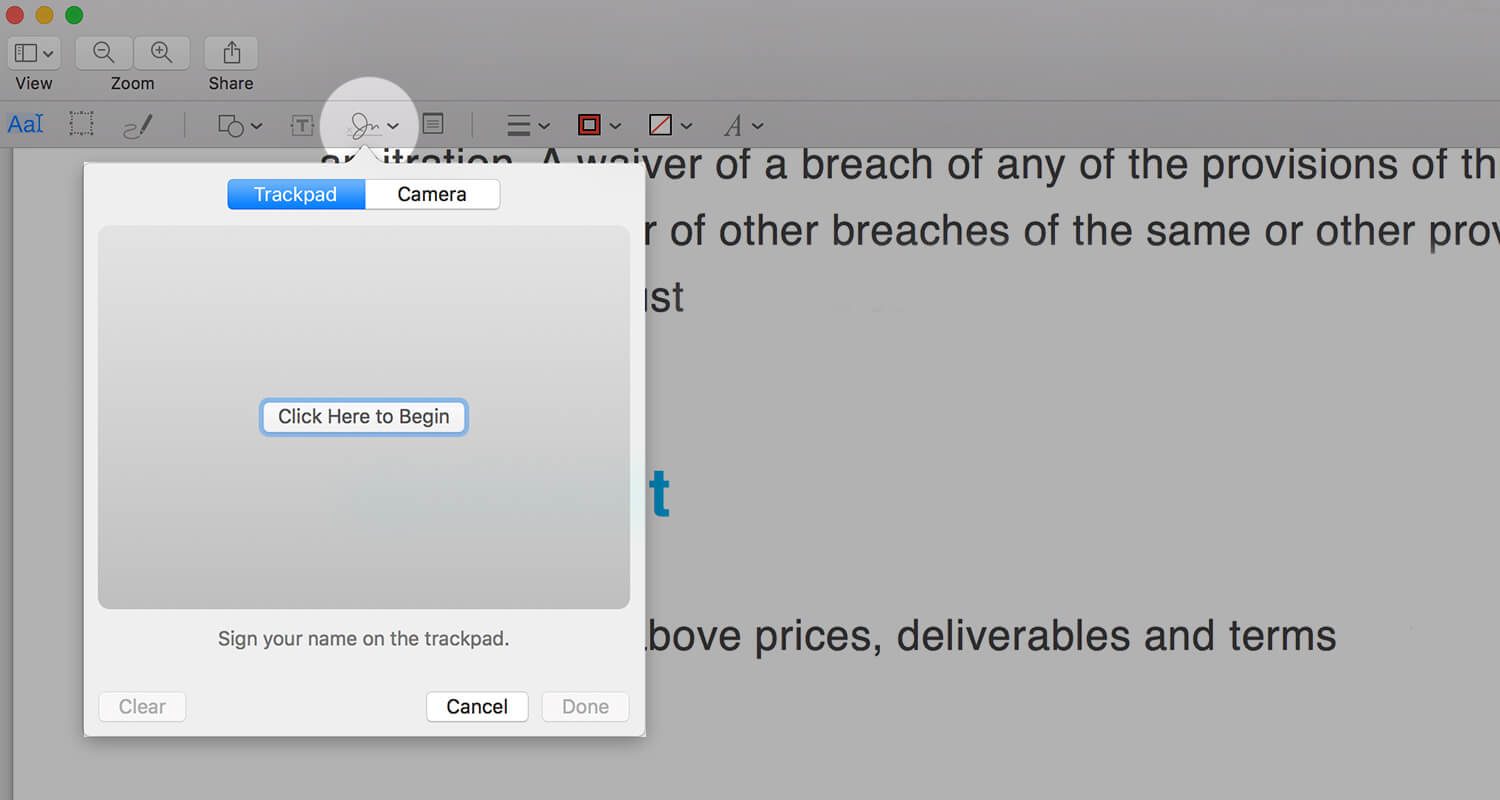
From here, you’ll be given two options:
1. Sign with a trackpad
Again, this is for people with steady fingers/hands. Draw your signature and click 'Done' when you’re satisfied with the result.
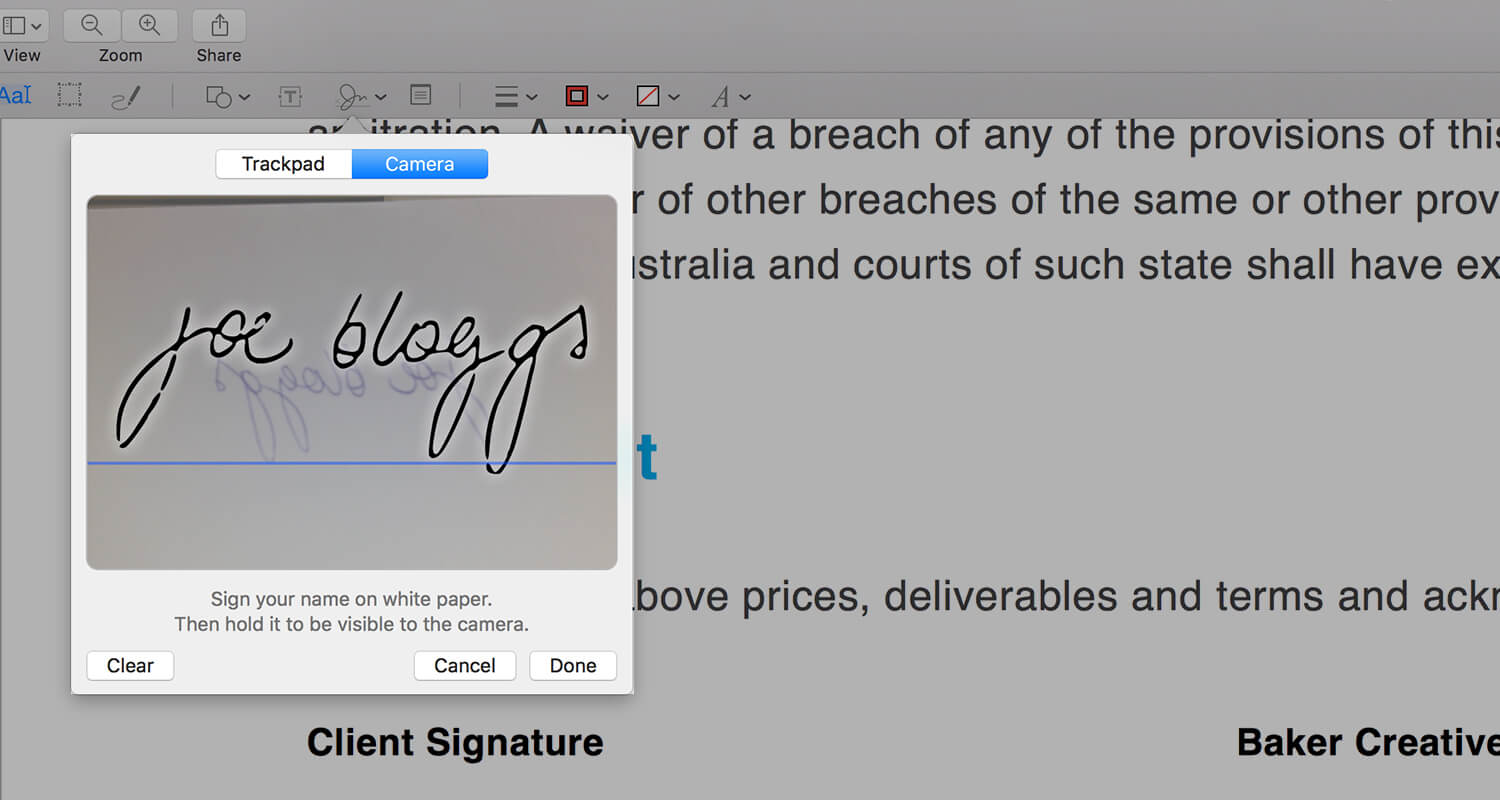
2. Sign with a Webcam
Sign a white piece of paper and then hold it up to your computer’s webcam so that it sits on the blue line. When it’s looking good, keep it steady and click 'done'.
Just like Adobe Acrobat Reader, Preview will save your signature for next time, so you won’t have to worry about setting it up again. Simply select your signature from the ‘Sign’ drop down menu.
Taking the time to set up your electronic signature in a few simple steps will save you time in the long run and will avoid the old print, sign, scan debacle! If you’re not a fan of Adobe Acrobat Reader or Preview, or you find that you need to collect or sign a lot of documents providers like Panda Docs, Hello Sign and DocuSign may be a better solution. Keep in mind that many of these aren’t free for unlimited use but they may be more user friendly depending on your needs.
So, how do you sign your documents? Let us know in the comments!
Continue Reading


